Spring XML配置
一、入门案例
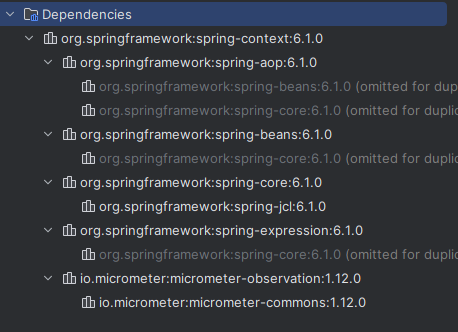
引入依赖
<dependency>
    <groupId>org.springframework</groupId>
    <artifactId>spring-context</artifactId>
    <version>6.1.0</version>
</dependency>
创建类HelloWorld
/**
 * @author 追梦路上的孩子
 * @version 1.0
 * @date 2023/12/19 19:34
 */
public class HelloWorld {
    public void sayHello(){
        System.out.println("Hello World!");
    }
}
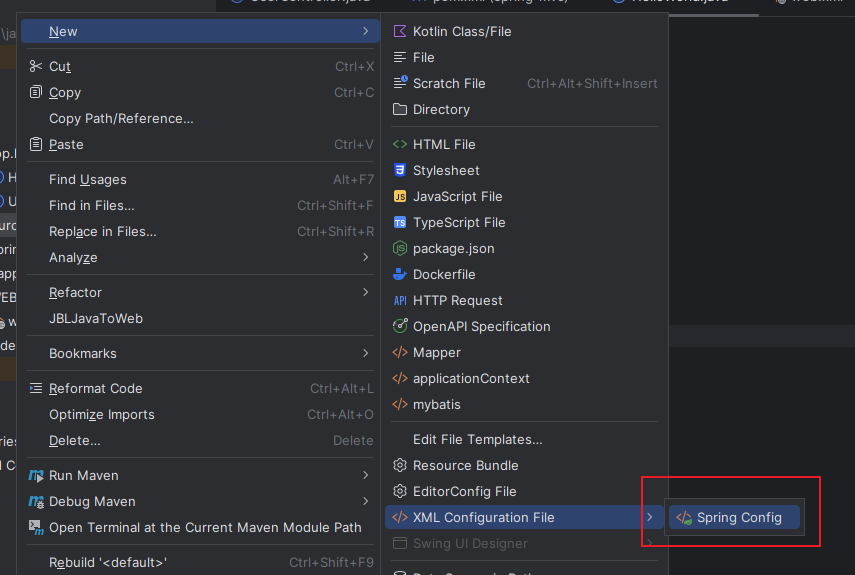
创建Spring的配置文件
在Spring的配置文件中配置bean
<!--
    配置HelloWorld所对应的bean,即将HelloWorld的对象交给Spring的IOC容器管理
    通过bean标签配置IOC容器所管理的bean
    属性:
        id:设置bean的唯一标识
        class:设置bean所对应类型的全类名
-->
  <bean id="helloworld" class="top.hyqstudio.controller.HelloWorld"/>
测试
import org.springframework.context.ApplicationContext;
import org.springframework.context.support.ClassPathXmlApplicationContext;

/**
 * @author 追梦路上的孩子
 * @version 1.0
 * @date 2023/12/19 19:53
 */
public class main {
    public static void main(String[] args) {
        ApplicationContext ioc=new ClassPathXmlApplicationContext("applicationContext.xml");
        HelloWorld helloWorld = (HelloWorld) ioc.getBean("helloWorld");
        helloWorld.sayHello();
    }
}
Spring 底层默认通过反射技术调用组件类的无参构造器来创建组件对象,这一点需要注意。如果在需要无参构造器时,没有无参构造器,则会抛出异常
二、Bean配置
<!--配置bean,配置后该类由spring管理-->
<bean class="这个Bean的类"
      name/id="Bean在容器里面的唯一名称"
      scope="Bean的作用域范围"
      lazy-init="是否为懒加载">
    <!-- Constructor-arg方式给属性赋值写法一 -->
    <constructor-arg type="int" value="1"/>
    <!-- Constructor-arg方式给属性赋值写法二-->
    <constructor-arg name="xx" value="2"/>
    <!-- Constructor-arg方式给属性赋值写法三-->
    <constructor-arg index="0" value="3"/>
    <!-- Properties方式给属性赋值写法一-->
    <property name="xx">
        <ref bean="另外一个Bean的名字"/>
    </property>
    <!-- Properties方式给属性赋值写法二-->
    <property name="xx" ref="另外一个Bean的名字"/>
    <!-- Properties方式给属性赋值写法三-->
    <property name="integerProperty" value="1"/>
</bean>
lazy-init:true/false(默认值)默认false,懒加载,让Spring容器在Bean首次用到时创建Bean实例,而不是在应用一启动就创建
constructor-arg依赖于构造器
property依赖于setter方法
scope
scope 用来配置 spring bean 的作用域
在spring2.0之前,bean只有2种作用域:singleton(单例)、non-singleton(也称 prototype)。
Spring2.0以后,增加了session、request、global session三种专用于Web应用程序上下文的Bean。
可选值
| 类型 | 说明 |
|---|---|
| singleton | 默认值,在Spring IoC容器中仅存在一个Bean实例,Bean以单实例的方式存在 |
| prototype | 每次从容器中调用Bean时,都返回一个新的实例 |
| request | 用 于 Web 应用程序。当为 Web 应用应用使用 SpringMVC 时 ,首先针对每个HTTP请求实例化带有请求作用域的 bean,然后在请求完成时销毁。 |
| session | 同一个HTTP session共享一个Bean,不同的HTTP session使用不同的Bean,该作用域仅适用于 Web 应用程序 |
| globalSession | 同一个全局Session共享一个Bean,一般用于Portlet环境,该作用域仅适用于WebApplicationContext环境 |
singleton(单例)
说明
当一个bean的 作用域设置为singleton, 那么Spring IOC容器中只会存在一个共享的bean实例,并且所有对bean的请求,只要id与该bean定义相匹配,则只会返回bean的同一实例。换言之,当把 一个bean定义设置为singleton作用域时,Spring IOC容器只会创建该bean定义的唯一实例。这个单一实例会被存储到单例缓存(singleton cache)中,并且所有针对该bean的后续请求和引用都 将返回被缓存的对象实例,这里要注意的是singleton作用域和GOF设计模式中的单例是完全不同的,单例设计模式表示一个ClassLoader中 只有一个class存在,而这里的singleton则表示一个容器对应一个bean,也就是说当一个bean被标识为singleton时候,spring的IOC容器中只会存在一个该bean,如果不希望在容器启动时提前实例化singleton的Bean,可以使用lazy-init属性进行控制
示例
<bean id="user" class="com.wener.example.bean.User" scope="singleton"/>
// 或者
<bean id="user" class="com.wener.example.bean.User" singleton="true"/>
private static void test() {
    ApplicationContext context = new ClassPathXmlApplicationContext("ApplicationContext.xml");
    UserDao dao = context.getBean("userDao", UserDao.class);
    UserDao dao1 = (UserDao) context.getBean("userDao");
    System.out.println(dao);
    System.out.println(dao1);
}
prototype
说明
设置为scope=”prototype”之后,每次调用getBean()都会返回一个新的实例
默认情况下,容器在启动时不会实例化prototype的Bean
Spring容器将prototype的Bean交给调用者后就不再管理它的生命周期
示例
<bean id="user" class="com.wener.example.bean.User" scope="prototype">
ApplicationContext context = new ClassPathXmlApplicationContext("ApplicationContext.xml");
User user = context.getBean("user", User.class);
User user1 = context.getBean("user",User.class);
System.out.println(user);
System.out.println(user1);
三、生命周期
Spring容器负责管理Bean的生命周期
- 创建bean实例
- 设置bean的属性值
- 调用初始化回调方法
- 使用Bean
- 调用销毁回调方法
- 销毁Bean
Bean在创建时,需要执行一些资源(数据库、套接字、文件)申请等初始化工作,可以在Bean的初始化回调方法中处理,此方法由Spring容器调用。
同样Bean在销毁时,需要执行一些资源(数据库、套接字、文件)申请等销毁工作,可以在Bean的销毁回调方法中处理,此方法由Spring容器调用。
核心属性
init-method
说明
初始化方法,此方法将在BeanFactory创建JavaBean实例之后,在向应用层返回引用之前执行。一般用于一些资源的初始化工作。
示例代码
public class User {
    public void init() {
        System.out.println("初始化");
    }
}<bean class="com.werner.di.User" name="user" init-method="init"/>
destroy-method
说明:
销毁方法,此方法将在BeanFactory销毁的时候执行,一般用于资源释放。
示例代码
public class User {
    public void destroy() {
      System.out.println("销毁...");
    }
}<bean class="com.wener.example.bean.User" id="user" init-method="init" destroy-method="destroy"/>
四、依赖注入
XML配置文件中,在bean的定义中可配置该bean的依赖项,通常使用的配置方式有2种
- 构造函数注入
- Setter方法注入
构造函数注入
- constructor-arg 属性,根据XML中的配置,Spring容器首先创建所依赖Bean实例,然后传递给类的构造函数。通过指定构造方法的参数来实例化Bean 。
可选属性
| 属性 | 说明 |
|---|---|
| type | 根据参数的类型,避免构造方法冲突 |
| value | 用于指定字符串类型、基本类型的属性值 |
| name | 属性的名称 |
| ref | 关联其它类型 |
| index | 对应于构造函数的多个参数,index属性的值从0开始 |
示例
public class Shop {
    private ShopDetail detail;
    private int shopId;
    private String title;
    private String name;
    public Shop() {
    }
    // 构造方法传入 ShopDetail detail
    public Shop(ShopDetail detail) {
      this.detail = detail
    }
    public Shop(int shopId, String title) {
        this.shopId = shopId;
        this.title = title;
    }

    public Shop(String title, String name) {
        this.title = title;
        this.name = name;
    }

    public Shop(int shopId, String title, String name) {
        this.shopId = shopId;
        this.title = title;
        this.name = name;
    }
    public int getShopId() {
        return shopId;
    }
    public void setShopId(int shopId) {
        this.shopId = shopId;
    }
    public String getTitle() {
        return title;
    }
    public void setTitle(String title) {
        this.title = title;
    }
    public String getName() {
        return name;
    }
    public void setName(String name) {
        this.name = name;
    }
    @Override
    public String toString() {
        return "Shop{" +
                "shopId=" + shopId +
                ", title='" + title + '\'' +
                ", name='" + name + '\'' +
                '}';
    }
}
<bean id="shop" class="com.wener.example.bean.Shop">
    <!--通过构造方法注入-->
    <constructor-arg type="int" value="1"/>
    <constructor-arg type="java.lang.String" value="iPhone X"/>
</bean>

<!-- 或者 -->
<bean id="shop" class="com.wener.example.bean.Shop">
    <!--通过构造方法注入-->
   <constructor-arg index="0" value="1"/>
   <constructor-arg index='title' value="手机"/>
   <constructor-arg index='2' value="iPhone X"/>
</bean>

<!--或者-->
<bean id="shop" class="com.wener.example.bean.Shop">
    <!--通过构造方法注入-->
   <constructor-arg name="id" value="1"/>
   <constructor-arg index='1' value="手机"/>
   <constructor-arg index='name' value="iPhone X"/>
</bean>
ApplicationContext context = new ClassPathXmlApplicationContext("ApplicationContext.xml");
Shop shop = context.getBean("shop", Shop.class);
System.out.println(shop.toString());
Setter方法注入
- property属性,根据XML中的配置,Spring容器调用类的Setter方法注入依赖项。
可选属性
| 属性 | 说明 |
|---|---|
| name | 属性的名称 |
| value | 主要是配置基本类型的属性值, |
| ref | 但是如果我们需要为Bean设置属性值是另一个Bean实例时,这个时候需要使用<ref.../>元素。使用<ref.../>元素可以指定如下两个属性。bean:引用不在同一份XML配置文件中的其他Bean实例的id属性值。local:引用同一份XML配置文件中的其他Bean实例的id属性值 |
示例
public class Shop {
    private ShopDetail detail;
    public void setDetail(ShopDetail detail) {
        this.detail = detail;
    }
    public ShopDetail getDetail() {
        return detail;
    }
}

public class ShopDetail {
    private String desc;
    public String getDesc() {
        return desc;
    }
    public void setDesc(String desc) {
        this.desc = desc;
    }
}
<bean id="shop" class="com.wener.example.bean.Shop">
    <property name="detail" ref="detail"/>
</bean>

<bean id="detail" class="com.wener.example.bean.ShopDetail"></bean>
Spring容器根据name调用setter方法:name对应“set”关键字后面的属性名,name="detail"对应于setDetail。
五、P命名空间(了解)
引入p命名空间后,可以通过以下方式为bean的各个属性赋值
<bean id="studentSix" class="com.atguigu.spring.bean.Student"
p:id="1006" p:name="小明" p:clazz-ref="clazzOne" p:teacherMap-ref="teacherMap"></bean>